
You May Also Enjoy:
I even added tabs to this one which are so easy to do, but sometimes I'm lazy (but they really are easy)


 Now using your zipper foot, your going to sew those layers from the start of one tab to the end of the other tab. Flip over and do the same with the other outer fabric and lining on the other side of zipper.


This post may contain affiliate links. Thanks for supporting Sisters, What!
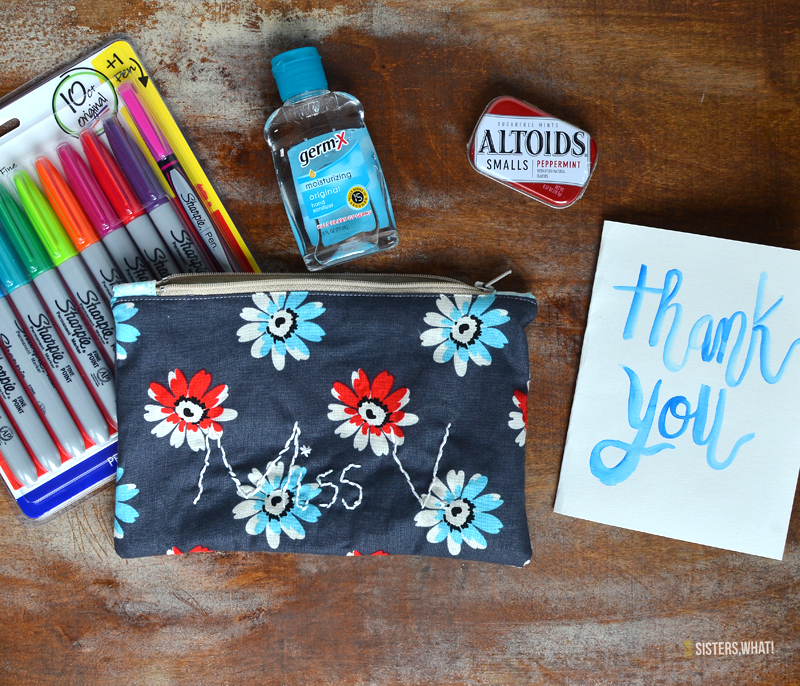
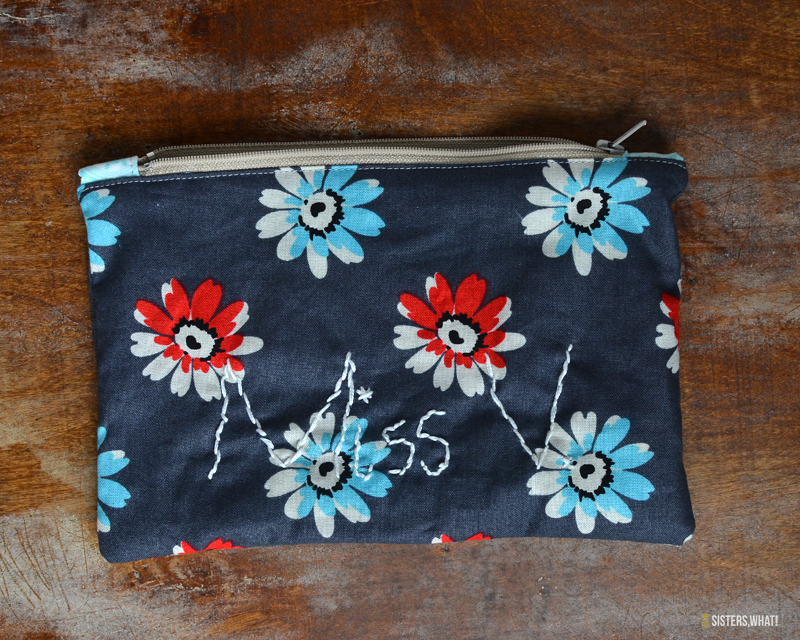
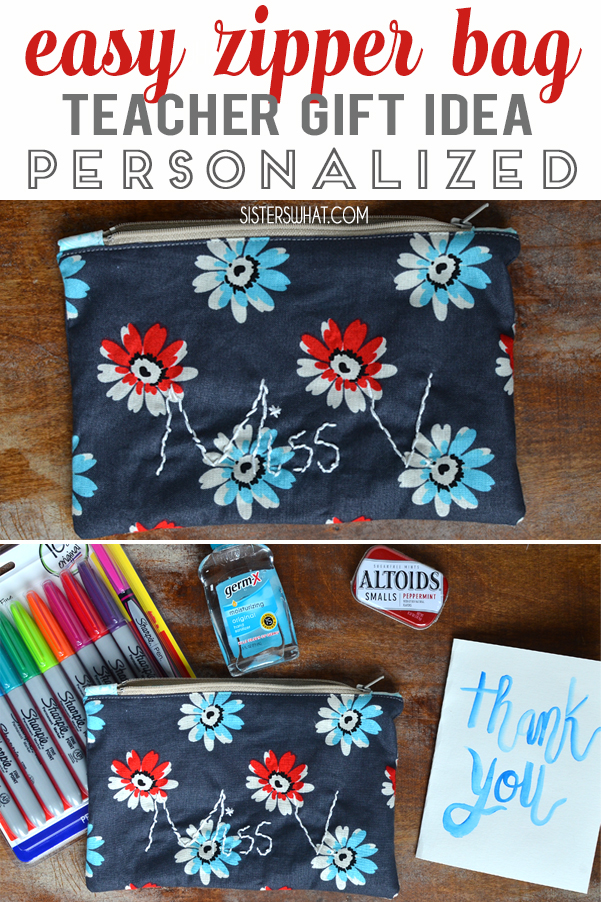
Last year for my boy's teacher gift, I made this little zipper bag with my son's hand writing turned lettering. He is always asking to help me sew so I had him stitch the name on, well I had to finish it but he did most of it. His teacher just loved it, especially since it was in his handwriting. Fill it with teacher's favorite things.
Easy Zipper Bag with Zipper Tabs - Add embroidered name of teacher to personalize.
Supplies:
2 pieces outer fabric 9 x 6
2 pieces fabric for lining 9 x 6
zipper 9" or 8" - we want it to be 1" shorter than the bag so we'll be shortening it.
1 piece of fabric for zipper tabs (in contrast fabric - could be same as lining) 3x3
Optional:
Sewing Clips
Optional:
Sewing Clips
Step 1: Add Embroidery
If you want to add a personalized name in embroidery, have your kiddo draw their teachers name on to a piece of paper about the same size as the outer fabric. Then using a washable fabric pen, sketch it on to one of the fabric pieces. Then start stitching the name on.Step 2: Iron Tabs
Now on to sewing. Grab your tabs and fold in half iron, then open and fold the sides in so they touch center and then fold again and iron.
Then cut the tab right in half.
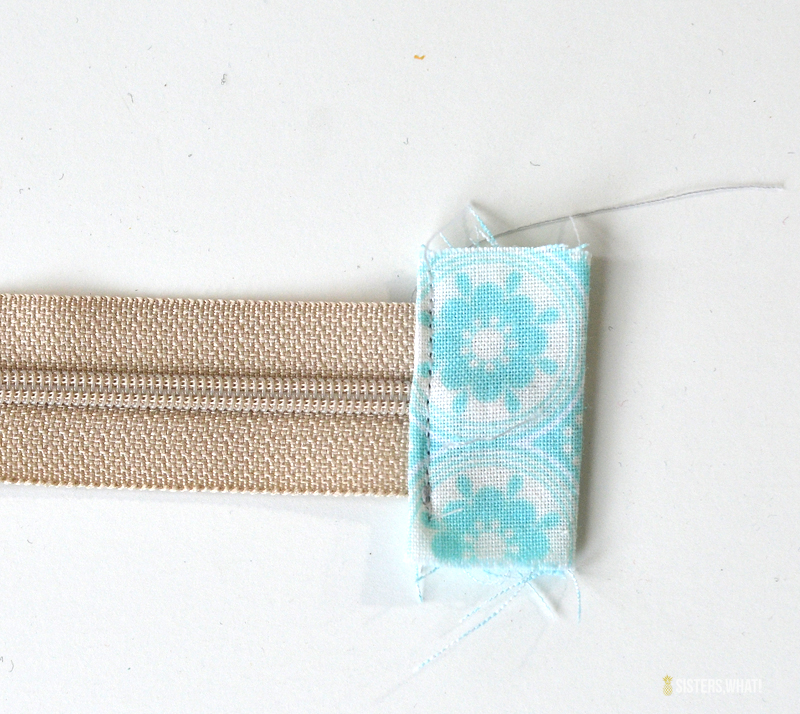
Step 3: Sew tabs on Zipper
Now take your zipper and make it 8" if it isn't already. Just measure and cut on the end of the zipper - go here for a good visual how to. Then place the tabs on both sides of zipper. Sew in place.Step 4: Sew on Zipper
Now we're going to sandwich your zipper inside one of the outer fabrics and the lining. Place your zipper right side together with the outer fabric.

Line the zipper up so that there is a half inch on each side of it. The lining will be also touching the outside fabric right side together with it.

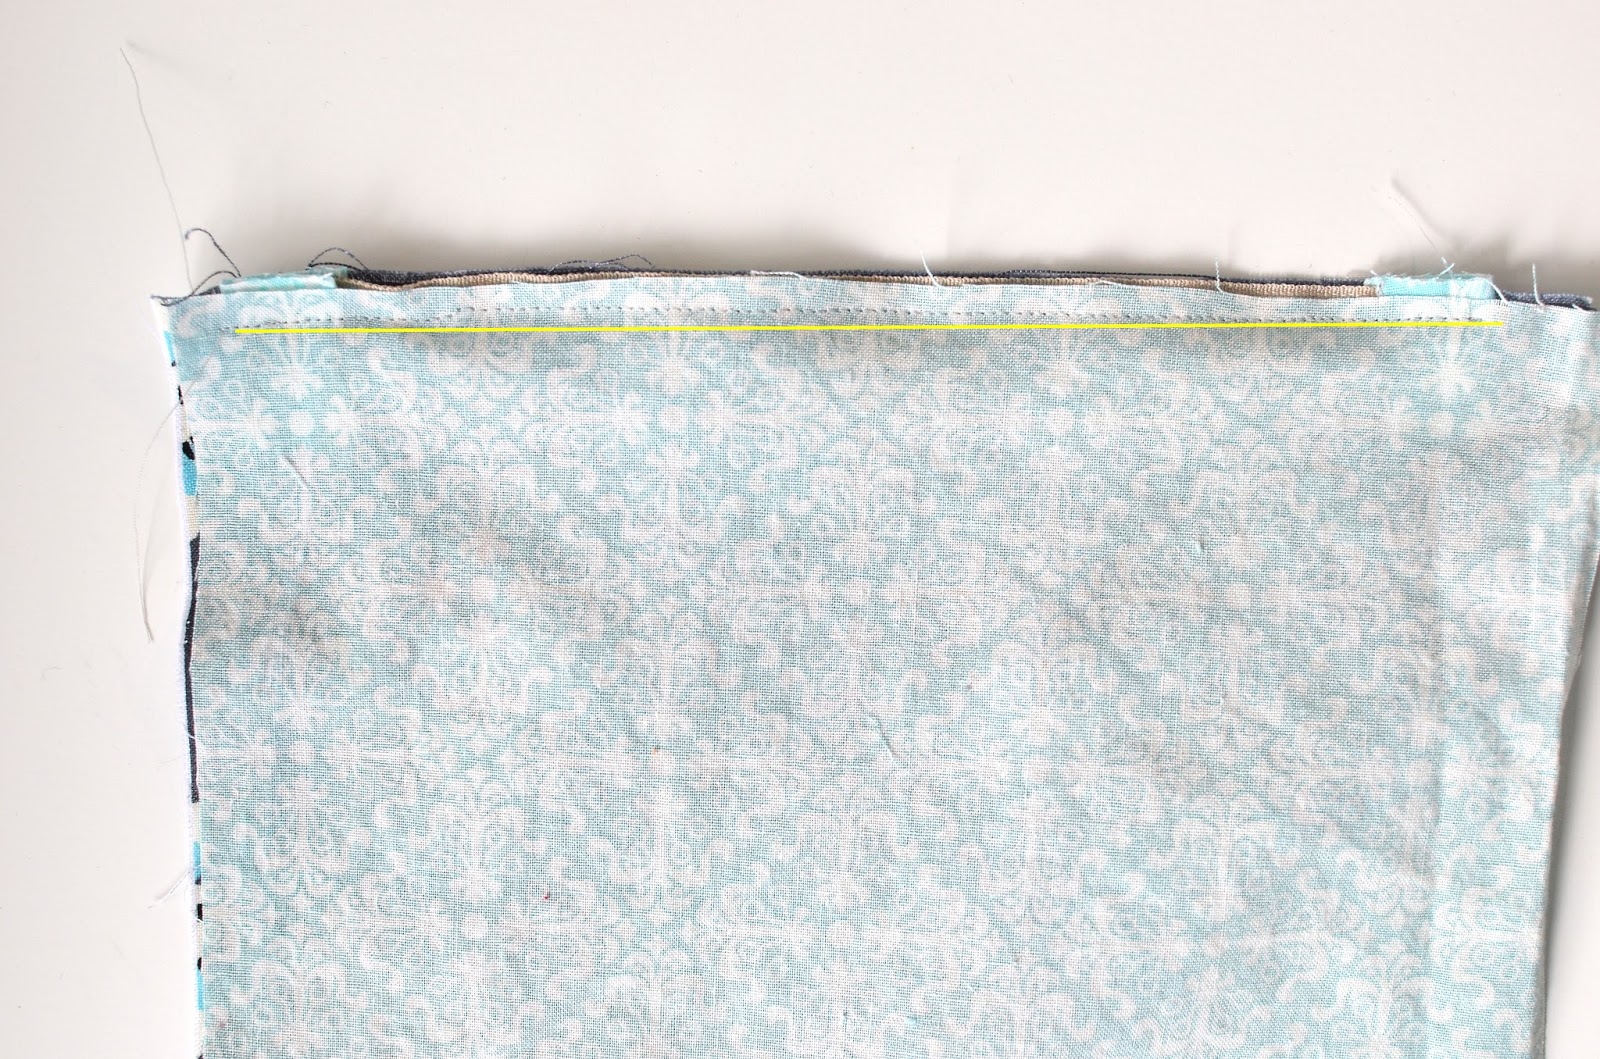
Step 5: Top Stitch Zipper
Now flip everything out with wrong sides together of both sides, top stitch along both sides of zipper from end of one tab to the end of the other tab.Step 6: Sew Around
Next, make sure your zipper is unzipped, flip the other fabric to be touching the other outer fabric right sides together and the lining fabric touching each other right side together. Starting on the lining side, sew all the way around leaving a 3 inch gap.Step 7:
Flip inside out, sew up the bottom of the lining and push it in to the bag. SO easy!! right!?!

This post may contain affiliate links. Thanks for supporting Sisters, What!


No comments
We LOVE hearing what you think. Thank you for your sweet comments!