
This DIY rope basket is made out of piping cord and very easy to sew. You can wrap some yarn around parts of the cord to add a dash of color to the basket. Make it into a fabric basket by wrapping your favorite fabric scraps instead of yarn. This post is written as a collaboration with JOANN Fabrics.

I'm kind of obsessed with storage boxes like these fabric covered boxes I made a couple of years ago. Storage containers don't have to be boring, but can also be cute and functional. I've been wanting to make a rope basket for years and decided to finally try my hand at it. I was happy to find that JOANN Fabric had enough piping cord to give it a try.
You may also enjoy these post:

I was inspired by these DIY no-sew rope baskets, but then I decided to just take the plunge and do the actual sewing basket method. And seriously, it was incredibly easy!!
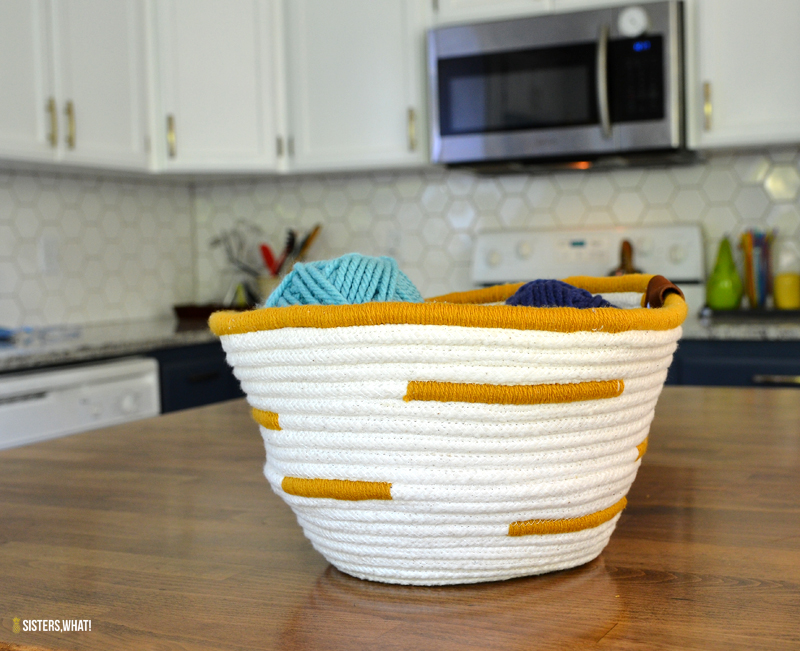
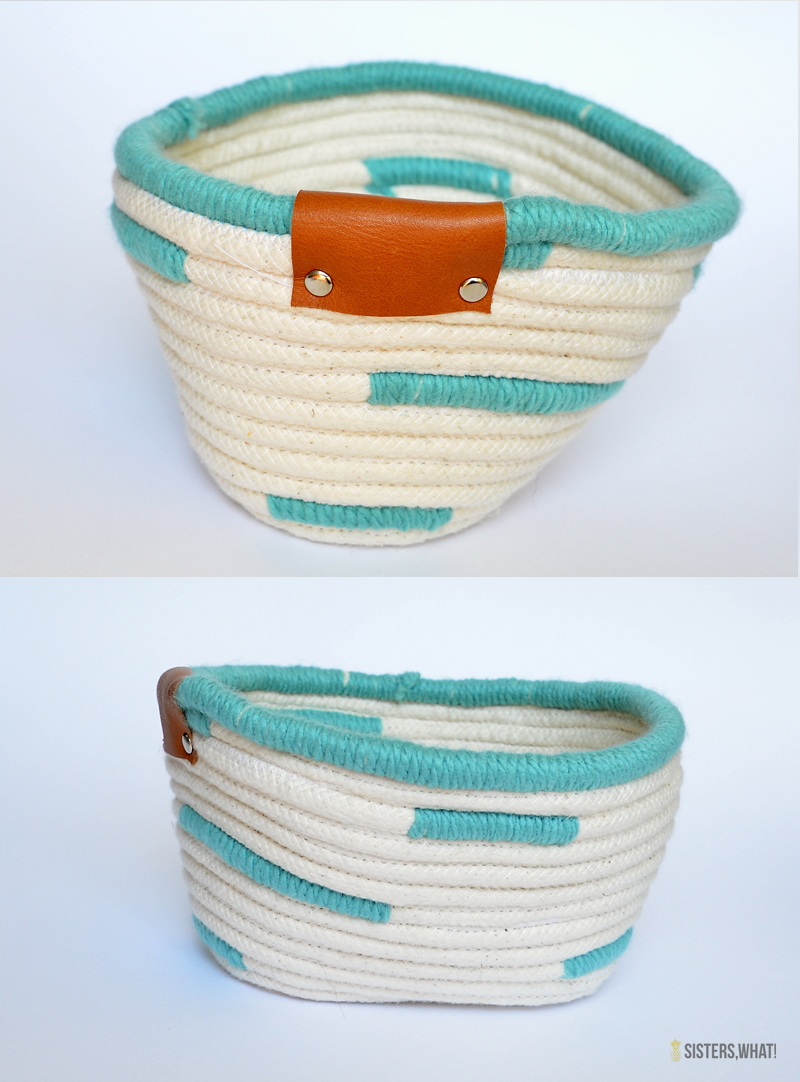
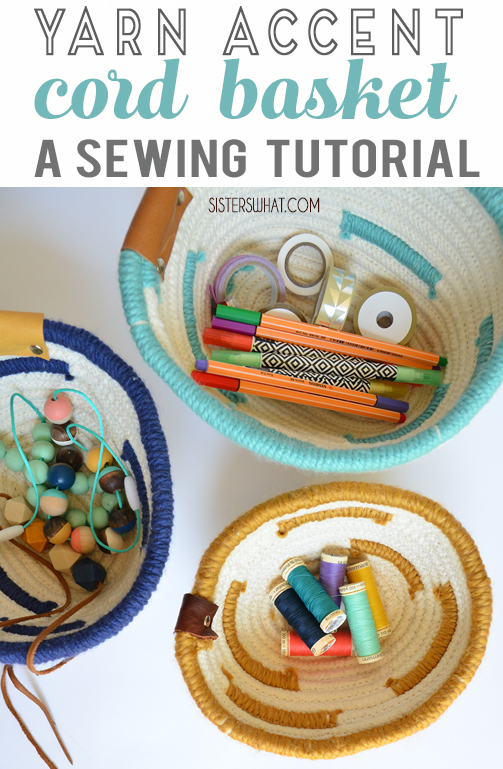
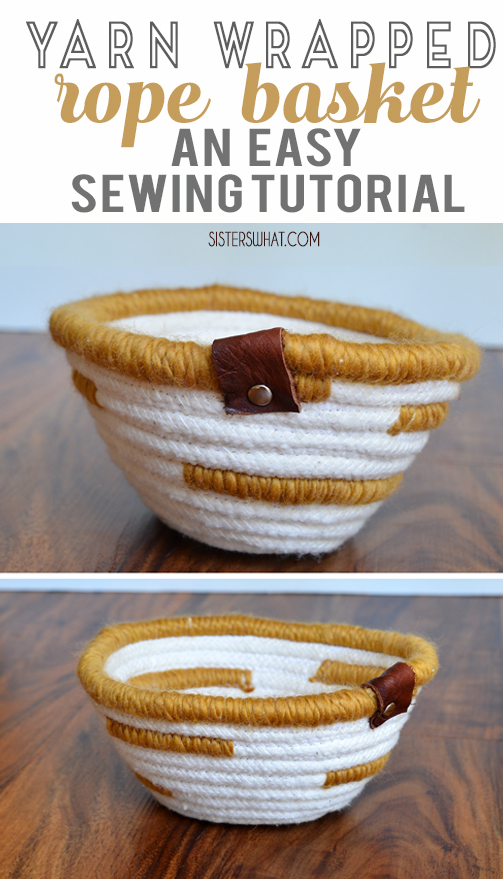
I made a few without yarn and then decided to add a bit of color by wrapping yarn around some of the cord. I seriously love how it turned out with the yarn. Adding the yarn was definitely more time consuming, but I'm glad I decided to try it. It adds a fun pop of color. But my favorite part is the little leather detail to hide the finished cord.

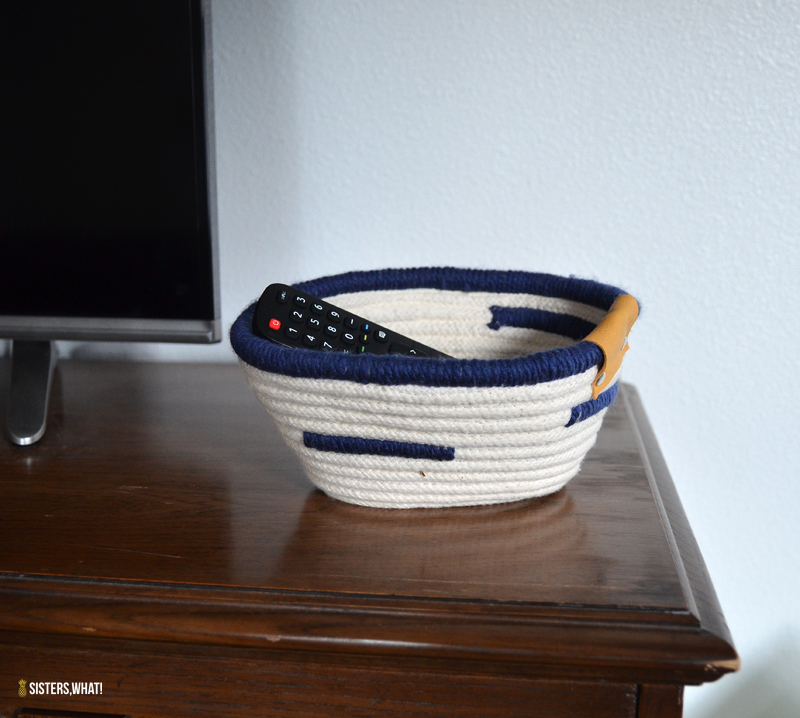
The bowls have already found a use.

DIY Yarn Wrapped Rope Basket Sewing Tutorial
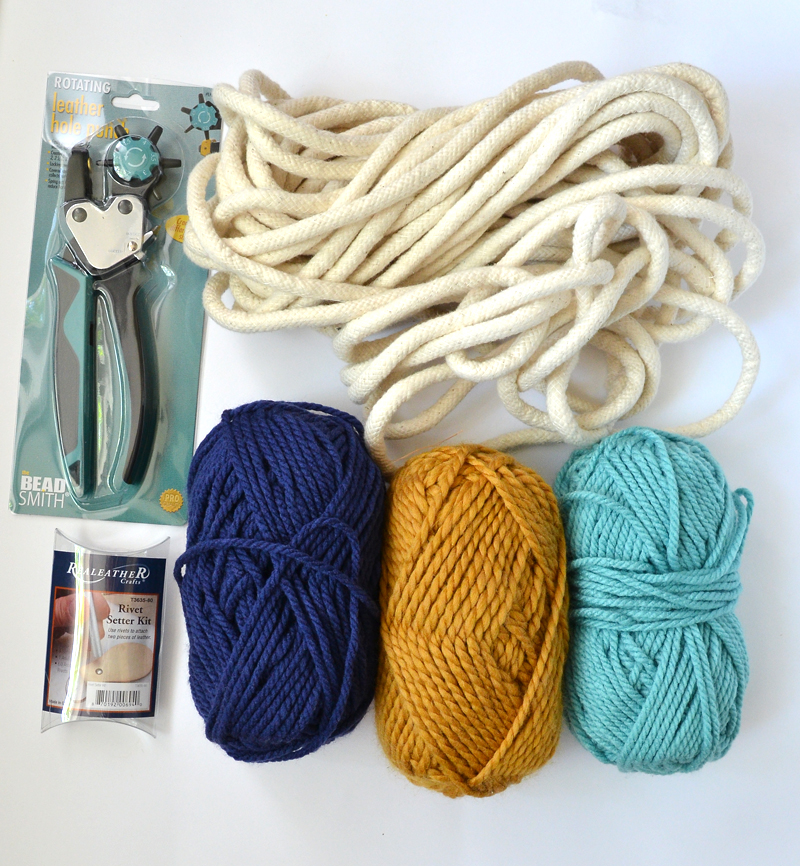
Supplies:
- 3/8" Piping Cord - 10 yards for one small basket
- Sharp/leather/jean Needle
- Yarn
- Leather Punch Tool
- Leather Rivet Tool
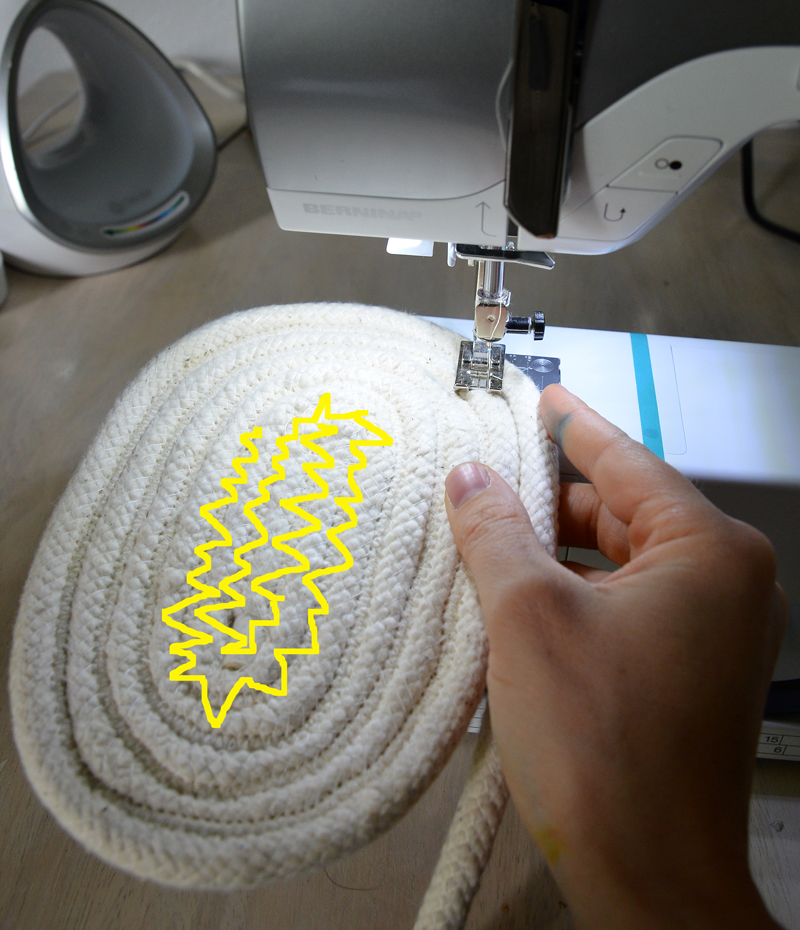
Step 1: Fold first 6 inches
First start with taking the first 6 inches of your piping and fold it over. You can choose to do more if you want a more oval shape basket.

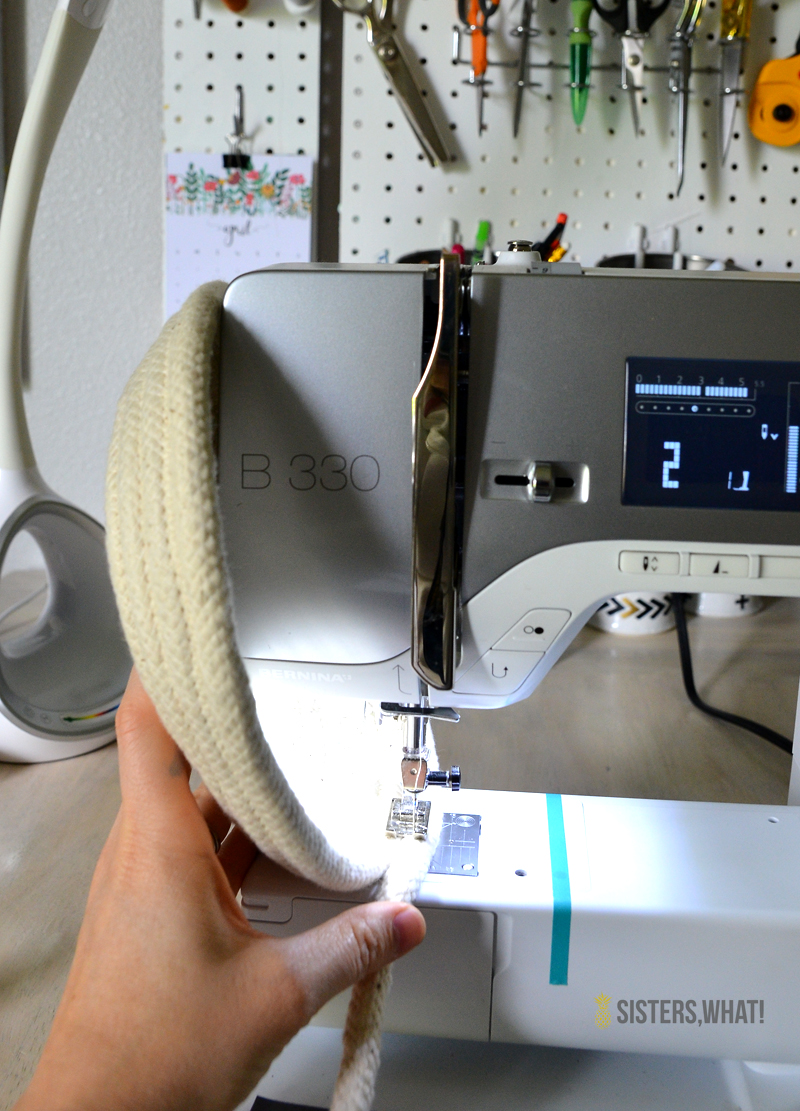
Step 2: Zig Zag Stitch
Next turn your zig zag stitch to as wide as possible and start zigzagging from the 6 inch piece that is foldover. Then wrap your cord around that and zig zag in a circle. Keep wrapping the cord around and around and sewing the outer cord with the inner cord.
Step 3: Start forming bowl
When you are happy with how big the bottom of bowl is, you're going to bring the bottom up to the edge of the machine and keep sewing. This will help make the bowl start forming. The picture above is how big the bottom of my bowl is before I then turned it up. I did about 12 cords from side to side.
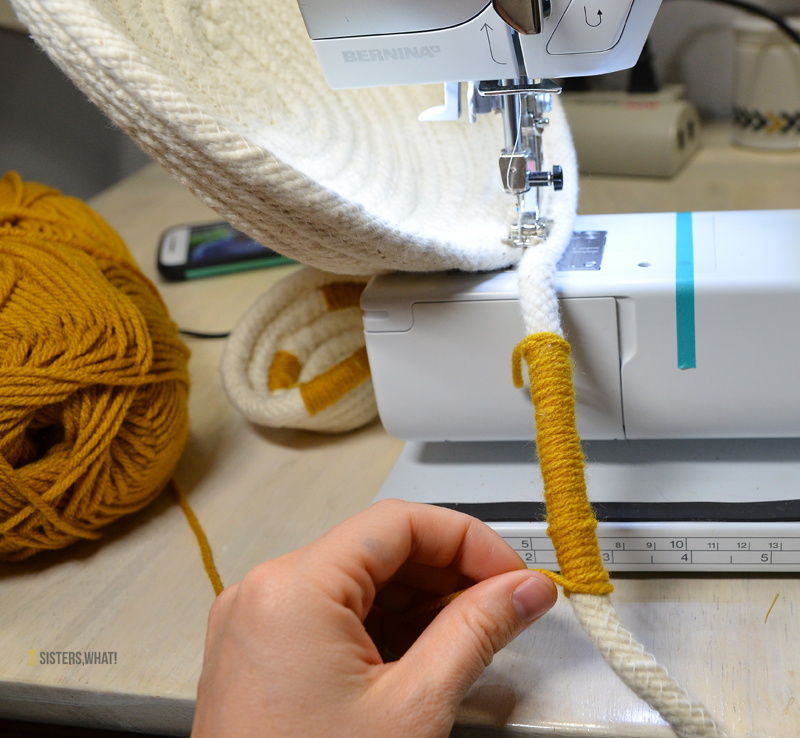
Step 4: Add yarn accents to bowl (optional)
If you want to add some yarn accents to your bowl, wrap sections of yarn around sections of your bowl as your sew. I did different sections about varying from 2-5" segments. I just eyeballed where I thought it needed more cord and then I would stop and wrap cord with yarn.
When you're happy with how big the bowl is, then zigzag up the edge of the cord and cut it off. You will then finish it off with a piece of scrap leather or faux leather. Cut a piece that can cover the end piece. Then using a leather punch and rivet tool, add your scrap leather on top.

And your done!


This post may contain affiliate links. Thanks for supporting Sisters, What!
Other sewing projects you might enjoy:


No comments
We LOVE hearing what you think. Thank you for your sweet comments!